nginx的访问控制、用户认证、https![]() 一、nginx的访问控制
一、nginx的访问控制
1、用于location段的allow、deny
Allow:设定允许哪台或哪些主机访问,多个参数间用空格隔开
Deny:设定禁止那台或哪些主机访问,多个参数间用空格隔开
举例:
(1)node1:(禁止192.168.100.20主机访问)
[root@stw ~]# vim /usr/local/nginx/conf/nginx.conf
[root@stw
~]# nginx -s reload


location /abc {
                echo "yyqx";
                deny 192.168.100.20;
        }
测试访问:
node2:
[root@stw2 ~]# curl http://192.168.100.10/abc
<html>
<head><title>403 Forbidden</title></head>
<body>
<center><h1>403 Forbidden</h1></center>
<hr><center>nginx/1.24.0</center>
</body>
</html>


node3:
[root@stw3 ~]# curl http://192.168.100.10/abc
yyqx
(2)node1:(允许192.168.100.20主机访问,没有写拒绝,则还是允许所有)
[root@stw ~]# vim /usr/local/nginx/conf/nginx.conf
[root@stw ~]# nginx -s reload


location /abc {
                echo "yyqx";
                allow 192.168.100.20;
        }
测试访问:
node2:
[root@stw2 ~]# curl http://192.168.100.10/abc
yyqx


node3:
[root@stw3 ~]# curl http://192.168.100.10/abc
yyqx
(3)node1:(允许192.168.100.20主机访问,拒接所有,即只允许20访问)
[root@stw ~]# vim /usr/local/nginx/conf/nginx.conf
[root@stw ~]# nginx -s reload


location /abc {
                echo "yyqx";
                allow 192.168.100.20;
                deny all;
        }
测试访问:
node2:
[root@stw2 ~]# curl http://192.168.100.10/abc
yyqx


node3:
[root@stw3 ~]# curl http://192.168.100.10/abc
<html>
<head><title>403 Forbidden</title></head>
<body>
<center><h1>403 Forbidden</h1></center>
<hr><center>nginx/1.24.0</center>
</body>
</html>
(4)node1:(将deny写在前面,则拒绝所有)
[root@stw ~]# vim /usr/local/nginx/conf/nginx.conf
[root@stw ~]# nginx -s reload


location /abc {
                echo "yyqx";
                deny all;
                allow 192.168.100.20;
        }
测试访问:
node2:
[root@stw2 ~]# curl http://192.168.100.10/abc
<html>
<head><title>403 Forbidden</title></head>
<body>
<center><h1>403 Forbidden</h1></center>
<hr><center>nginx/1.24.0</center>
</body>
</html>


node3:
[root@stw3 ~]# curl http://192.168.100.10/abc
<html>
<head><title>403 Forbidden</title></head>
<body>
<center><h1>403 Forbidden</h1></center>
<hr><center>nginx/1.24.0</center>
</body>
</html>
2、开启stub_status模块(查看连接请求的处理状态)
stub_status模块主要作用于查看nginx的一些状态信息
node1:
[root@stw ~]# vim /usr/local/nginx/conf/nginx.conf
[root@stw ~]# nginx -s reload


location /status {
                echo "yyqx";
                stub_status on;
        }
测试访问:
[root@stw2 ~]# curl http://192.168.100.10/status
Active connections: 1
server accepts handled requests
 9 9 9
Reading: 0 Writing: 1 Waiting: 0
Active connections:当前nginx正在处理的活动连接数
Server accepts handled requests:nginx总共处理了9个连接,成功创建9次握手,总共处理了9个请求
Reading:nginx读取到客户端的Header信息数
Writing:nginx返回给客户端的Header信息数
Waiting:开启keep-alive的情况下,这个值等于active-(reading+writing),意思就是nginx已经处理完成,正在等候下一次请求指令的驻留连接。
所以在访问效率高、请求很快就被处理完毕的情况下,waiting数比较多是正常的。
如果reading+writing数较多,则说明并发访问量非常大,正在处理过程中。
二、用户认证
1、安装httpd-tools软件包
[root@stw yum.repos.d]# ls
CentOS-Base.repo  epel.repo  epel-testing.repo
[root@stw yum.repos.d]# yum -y install httpd-tools
2、用htpasswd来创建文件及用户
htpasswd -c -m /path/to/.user_auth_file USERNAME(/path/to/:文件路径位置;.user_auth_file:文件名称,这里.表示隐藏文件;USERNAME:用户名)
[root@stw yum.repos.d]# cd
[root@stw ~]# cd /usr/local/nginx/conf
[root@stw conf]# pwd
/usr/local/nginx/conf
[root@stw conf]# ls
fastcgi.conf            koi-win             scgi_params
fastcgi.conf.default    mime.types          scgi_params.default
fastcgi_params          mime.types.default  uwsgi_params
fastcgi_params.default  nginx.conf          uwsgi_params.default
koi-utf                 nginx.conf.default  win-utf
[root@stw conf]# htpasswd -c -m .user_auth_file yyqx
New password:       //密码为123456
Re-type new password:
Adding password for user yyqx
[root@stw conf]# ls -a
.                       koi-utf             scgi_params
..                      koi-win             scgi_params.default
fastcgi.conf            mime.types          .user_auth_file
fastcgi.conf.default    mime.types.default  uwsgi_params
fastcgi_params          nginx.conf          uwsgi_params.default
fastcgi_params.default  nginx.conf.default  win-utf
[root@stw conf]# cat .user_auth_file
yyqx:$apr1$P3dtjLMc$LCjEsPQ9iAPLKD6.DTs1e/
3、配置nginx(注意auth_basic_user_file必须用绝对路径)
[root@stw conf]# vim /usr/local/nginx/conf/nginx.conf
[root@stw conf]# nginx -t
nginx: the configuration file /usr/local/nginx/conf/nginx.conf syntax is ok
nginx: configuration file /usr/local/nginx/conf/nginx.conf test is successful
[root@stw conf]# nginx -s reload
location /status {
stub_status on;
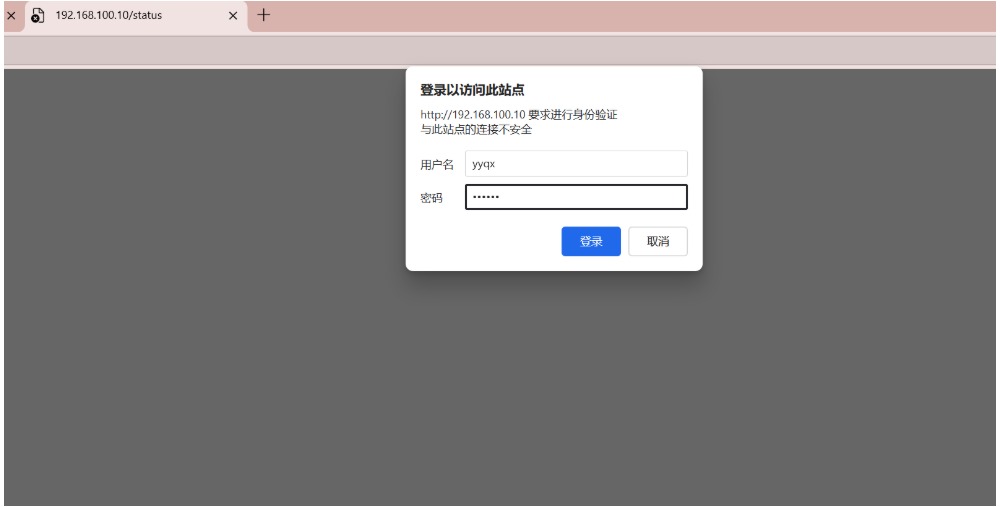
auth_basic "welcone to";
auth_basic_user_file "/usr/local/nginx/conf/.user_auth_file";
}
浏览器测试访问:(用户名:yyqx,密码:123456)

三、https配置
Nginx:192.168.100.10
CA:192.168.100.20
1、在CA服务器中生成一对密钥(私钥和公钥)
[root@stw2 ~]# cd /etc/pki/CA
[root@stw2 CA]# ls
certs  crl  newcerts  private
[root@stw2 CA]# (umask 077;openssl genrsa -out private/cakey.pem 2048)
Generating RSA private key, 2048 bit long modulus
.......................................................................................................................+++
..............+++
e is 65537 (0x10001)
[root@stw2 CA]# openssl rsa -in private/cakey.pem -pubout
writing RSA key
-----BEGIN PUBLIC KEY-----
MIIBIjANBgkqhkiG9w0BAQEFAAOCAQ8AMIIBCgKCAQEAsudeYDlwO4EgnK16RsEX
mhzrf4fqKeTSBSPrCWEDCDrqi6xdsC1clgqxKeC3DAvriU6UrmR9nzjUecQWIszu
JKtXugMNZZ9Tkv50dIuMI0b303VkAqzRdVvJpd6KEgb6vE7SVQuY3HhL+CA/V2Uj
MddiE0aAHe5bjw59D6noa9iTi4xDtjBeSg6pWY8oDFyF6mttRP0AbihzqGz8YrbR
d/pAMFYLJvVcaEP63qm9abtGvzT80l6COUogRxFGr6Qb0exXo6t7tuxw3fnMRk52
WB0IxfDuvu8zr21eAybPnNMYXS80Q+yOOSCXL+/D1Uao8uMt98P71TJ/byxv5KWQ
DwIDAQAB
-----END PUBLIC KEY-----
2、生成签名证书(相当于机构定义一个证书标准)
[root@stw2 CA]# openssl req -new -x509 -key private/cakey.pem -out cacert.pem -days 1024
You are about to be asked to enter information that will be incorporated
into your certificate request.
What you are about to enter is what is called a Distinguished Name or a DN.
There are quite a few fields but you can leave some blank
For some fields there will be a default value,
If you enter '.', the field will be left blank.
-----
Country Name (2 letter code) [XX]:CN
State or Province Name (full name) []:HB
Locality Name (eg, city) [Default City]:WH
Organization Name (eg, company) [Default Company Ltd]:LQ
Organizational Unit Name (eg, section) []:linux
Common Name (eg, your name or your server's hostname) []:yyqx
Email Address []:admin@example.com
3、创建两个文件(index.txt和序列号serial)
[root@stw2 CA]# touch /etc/pki/CA/index.txt
[root@stw2 CA]# echo "01" > /etc/pki/CA/serial
[root@stw2 CA]# ls
cacert.pem  certs  crl  index.txt  newcerts  private  serial
4、在nginix中先生成私钥(httpd.key),再生成证书签署请求,发送给CA
[root@stw conf]# pwd
/usr/local/nginx/conf
[root@stw conf]# (umask 077;openssl genrsa -out httpd.key 2048)
Generating RSA private key, 2048 bit long modulus
.............+++
...........................................................................................................................+++
e is 65537 (0x10001)
[root@stw conf]# openssl req -new -key httpd.key -days 1024 -out httpd.csr
You are about to be asked to enter information that will be incorporated
into your certificate request.
What you are about to enter is what is called a Distinguished Name or a DN.
There are quite a few fields but you can leave some blank
For some fields there will be a default value,
If you enter '.', the field will be left blank.
-----
Country Name (2 letter code) [XX]:CN
State or Province Name (full name) []:HB
Locality Name (eg, city) [Default City]:WH
Organization Name (eg, company) [Default Company Ltd]:LQ
Organizational Unit Name (eg, section) []:linux
Common Name (eg, your name or your server's hostname) []:stw
Email Address []:admin@example.com


Please enter the following 'extra' attributes
to be sent with your certificate request
A challenge password []:
An optional company name []:
[root@stw conf]# ls
fastcgi.conf            koi-utf             scgi_params
fastcgi.conf.default    koi-win             scgi_params.default
fastcgi_params          mime.types          uwsgi_params
fastcgi_params.default  mime.types.default  uwsgi_params.default
httpd.csr               nginx.conf          win-utf
httpd.key               nginx.conf.default
[root@stw conf]# scp httpd.csr root@192.168.100.20:/root/
The authenticity of host '192.168.100.20 (192.168.100.20)' can't be established.
ECDSA key fingerprint is SHA256:R7/1dpul7cu8SnefsN2wQw5hKDL+xekk0ffasLS6OGI.
ECDSA key fingerprint is MD5:81:88:a1:16:52:83:c0:d5:59:ad:2b:3a:d5:52:02:bc.
Are you sure you want to continue connecting (yes/no)? yes
Warning: Permanently added '192.168.100.20' (ECDSA) to the list of known hosts.
root@192.168.100.20's password:
httpd.csr
在CA主机中查看
[root@stw2 ~]# ls
anaconda-ks.cfg  Documents  httpd.csr             Music     Public     Videos
Desktop          Downloads  initial-setup-ks.cfg  Pictures  Templates
5、CA签署证书
[root@stw2 ~]# openssl ca -in httpd.csr -out httpd.crt -days 1024
Using configuration from /etc/pki/tls/openssl.cnf
Check that the request matches the signature
Signature ok
Certificate Details:
        Serial Number: 1 (0x1)
        Validity
            Not Before: Sep 26 02:51:16 2025 GMT
            Not After : Jul 16 02:51:16 2028 GMT
        Subject:
            countryName               = CN
            stateOrProvinceName       = HB
            organizationName          = LQ
            organizationalUnitName    = linux
            commonName                = stw
            emailAddress              = admin@example.com
        X509v3 extensions:
            X509v3 Basic Constraints:
                CA:FALSE
            Netscape Comment:
                OpenSSL Generated Certificate
            X509v3 Subject Key Identifier:
                4B:B5:0C:89:B0:23:84:8A:31:5E:E8:71:61:71:B0:D9:F7:34:2B:9D
            X509v3 Authority Key Identifier:
                keyid:EB:5E:9C:EC:A9:A3:03:1E:08:D0:29:90:4E:29:4B:31:1A:0D:56:8A


Certificate is to be certified until Jul 16 02:51:16 2028 GMT (1024 days)
Sign the certificate? [y/n]:y


1 out of 1 certificate requests certified, commit? [y/n]y
Write out database with 1 new entries
Data Base Updated
[root@stw2 ~]# ls
anaconda-ks.cfg  Documents  httpd.crt  initial-setup-ks.cfg  Pictures  Templates
Desktop          Downloads  httpd.csr  Music                 Public    Video
6、将CA签署的证书httpd.crt和服务器的证书cacert.pem发送给nginx
[root@stw2 ~]# scp httpd.crt root@192.168.100.10:/usr/local/nginx/conf/
The authenticity of host '192.168.100.10 (192.168.100.10)' can't be established.
ECDSA key fingerprint is SHA256:R7/1dpul7cu8SnefsN2wQw5hKDL+xekk0ffasLS6OGI.
ECDSA key fingerprint is MD5:81:88:a1:16:52:83:c0:d5:59:ad:2b:3a:d5:52:02:bc.
Are you sure you want to continue connecting (yes/no)? yes
Warning: Permanently added '192.168.100.10' (ECDSA) to the list of known hosts.
root@192.168.100.10's password:
httpd.crt                                                 100% 4522     2.3MB/s   00:00
[root@stw2 ~]# scp /etc/pki/CA/cacert.pem root@192.168.100.10:/usr/local/nginx/conf/
root@192.168.100.10's password:
cacert.pem                                                100% 1359   442.7KB/s   00:00
nginx中查看
[root@stw conf]# ls
cacert.pem              httpd.crt  mime.types          scgi_params.default
fastcgi.conf            httpd.csr  mime.types.default  uwsgi_params
fastcgi.conf.default    httpd.key  nginx.conf          uwsgi_params.default
fastcgi_params          koi-utf    nginx.conf.default  win-utf
fastcgi_params.default  koi-win    scgi_params
7、nginx配置https(修改配置文件之前将配置文件备份)
[root@stw conf]# cp nginx.conf nginx.conf.bak
[root@stw conf]# vim nginx.conf
[root@stw conf]# nginx -t
nginx: the configuration file /usr/local/nginx/conf/nginx.conf syntax is ok
nginx: configuration file /usr/local/nginx/conf/nginx.conf test is successful


    # HTTPS server
    #
    server {
        listen       443 ssl;
        server_name  localhost;


        ssl_certificate      httpd.crt;
        ssl_certificate_key  httpd.key;


        ssl_session_cache    shared:SSL:1m;
        ssl_session_timeout  5m;


        ssl_ciphers  HIGH:!aNULL:!MD5;
        ssl_prefer_server_ciphers  on;


        location / {
            root   html;
            index  index.html index.htm;
        }
    }


}
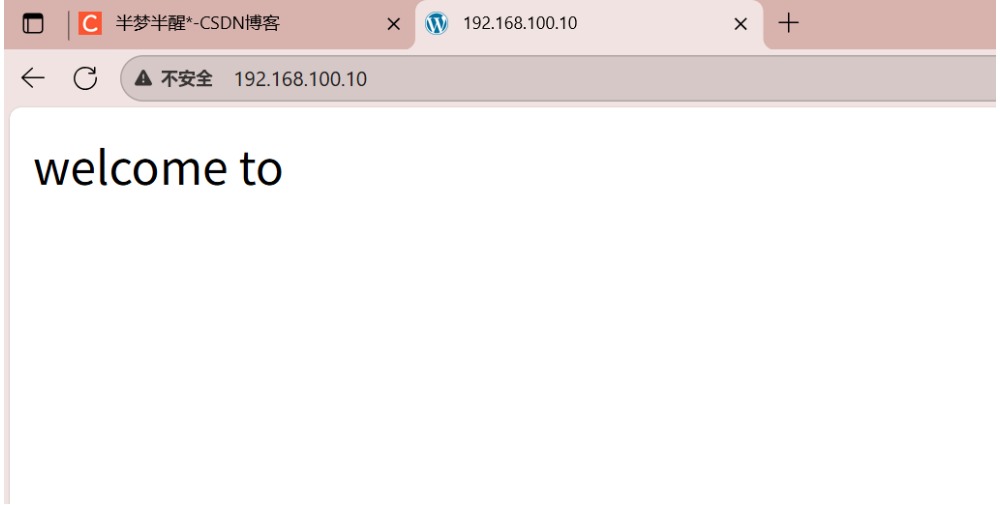
8、编辑测试网页,重载服务,验证
[root@stw conf]# cd /usr/local/nginx
[root@stw nginx]# ls
client_body_temp  fastcgi_temp  logs        sbin       uwsgi_temp
conf              html          proxy_temp  scgi_temp
[root@stw nginx]# cd html
[root@stw html]# ls
50x.html  index.html
[root@stw html]# echo "welcome to" > index.html
[root@stw html]# nginx -s reload
参考文章:原文链接
该文章在 2025/9/29 10:11:38 编辑过


 400 186 1886